

If you’re looking to enhance your Jeep’s functionality, installing a switch panel is one of the best ways to provide control over various accessories, such as lights, winches, and other electronic devices. A well-designed switch panel allows for easy access and organization of these controls, making your off-road adventures more manageable and enjoyable.
In this guide, we will walk you through the process of wiring a switch panel in your Jeep step by step. Whether you are a seasoned DIY enthusiast or a newbie looking to gain some hands-on experience, our instructions will provide you with all the necessary details to successfully set up a control system for your accessories. From selecting the right components to ensuring proper installation, each section will build on the last, ensuring that you have a clear understanding of the entire process.
By the end of this article, you will be equipped with the knowledge and confidence to wire a switch panel that not only looks great but also operates flawlessly. Let’s get started on turning your Jeep into the ultimate adventure vehicle with a customized accessory control system.
Choosing the Right Switch Panel for Your Jeep
When it comes to customizing your Jeep with various accessories, selecting the right switch panel is crucial for effective control and functionality. A switch panel allows you to manage multiple electrical components seamlessly, enhancing your off-road experience.
First, consider the number of accessories you plan to control. Determine the total amount of switches you’ll need based on items such as lights, winches, or other aftermarket gadgets. Opt for a switch panel that accommodates all your requirements without overcrowding. Panels vary in size and configuration, so choose one that suits your Jeep’s design and available space.
Next, assess the compatibility of the switch panel with your existing electrical system. Ensure that it can handle the voltage and amperage of the accessories you intend to connect. Look for panels designed specifically for off-road vehicles; these often come with built-in fuses and relays for added safety and reliability.
Another key factor is the material and construction of the switch panel. Durable materials like aluminum or high-quality plastics provide better resistance to wear and tear, especially in rugged environments. Waterproof or weather-resistant features can also be beneficial, protecting the switches from rain, mud, and dust.
Finally, consider the aesthetics and ease of access. A switch panel should blend well with the interior of your Jeep while remaining easily reachable from the driver’s seat. Look for illuminated switches if you plan on using accessories at night, as they provide improved visibility and prevent accidental activation.
By keeping these factors in mind, you’ll be able to choose a switch panel that not only meets your needs but also enhances your Jeep’s functionality and style.
Gathering Necessary Tools and Materials
Before you start wiring the switch panel in your Jeep, it’s essential to gather all necessary tools and materials. This preparation will ensure a smooth installation process and minimize the risk of errors or complications. Below is a list of items you will need:
| Tools | Description |
|---|---|
| Wire Strippers | Used to remove insulation from the electrical wires for connections. |
| Screwdriver Set | A basic set of screwdrivers, both Phillips and flathead, to secure the panel and switches. |
| Drill | Required for making holes in the Jeep’s body or mounting brackets for the switch panel. |
| Multimeter | Helps in measuring voltage and ensuring correct connections. |
| Heat Shrink Tubing | Provides insulation and electrical protection for wire connections. |
In addition to tools, you must gather the following materials:
| Materials | Description |
|---|---|
| Switch Panel | The main component that houses the switches for your accessories. |
| Switches | These are the individual controls that will activate various accessories. |
| Wiring Harness | A set of pre-made wiring that simplifies connections between your switches and the Jeep’s electrical system. |
| Fuses | Used to protect your wiring and accessories from electrical overloads. |
| Connectors | Essential for securely joining wires together, ensuring reliable electrical connections. |
Having these tools and materials ready will set you up for a successful installation of your switch panel and ensure that all accessories function correctly in your Jeep.
Identifying the Wiring Layout of Your Jeep
Understanding the wiring layout of your Jeep is crucial when installing a custom switch panel for controlling various accessories. Each Jeep model has a specific wiring scheme that dictates how electrical components are connected and powered. To successfully identify the wiring layout, follow these guidelines.
Consult the Owner’s Manual: Start by referring to your Jeep’s owner manual. This document contains wiring diagrams that provide valuable insights into the electrical system. Pay attention to sections that detail the fuse box and the associated circuits for different accessories.
Locate the Fuse Box: The fuse box is typically found under the dashboard or in the engine compartment. By locating it, you can trace wiring that leads to different components. Take note of which fuses control specific accessories; this information will guide you in successfully wiring your switch panel.
Utilize a Multimeter: A multimeter is an essential tool for testing voltage and continuity. With the help of this device, you can identify which wires are hot and which are ground. This will help you determine the appropriate connections for your control panel.
Identify Common Wire Colors: Familiarize yourself with standard wire color codes used in automotive applications. For example, red often signifies a positive wire, while black indicates ground. This knowledge will aid you in distinguishing between different circuits within your Jeep.
Trace the Wiring: If your wiring layout is complex, consider tracing wires from existing components to see where they connect. This allows you to visualize the entire circuit path and identify any potential issues before installing your switch panel.
Document Your Findings: As you map out the wiring layout, take detailed notes or create a diagram. Documenting your findings will serve as a reference during installation and ensure that your control panel functions as intended.
By thoroughly identifying the wiring layout of your Jeep, you can confidently proceed with the installation of your switch panel, ensuring that all accessories are controlled effectively and safely.
Connecting Switches to Power Sources
To effectively connect switches to power sources in your Jeep’s switch panel, follow these essential steps to ensure a reliable and safe installation.
- Choose the Right Power Source:
Select a power source that matches the voltage and current requirements of your switches. Most Jeep switch panels operate on a 12V system, so ensure compatibility.
- Gather Necessary Tools and Materials:
Before starting, collect the following tools and materials:
- Wire strippers
- Electrical tape
- Soldering iron (optional)
- Heat shrink tubing (optional)
- A multimeter for testing
- Crimp connectors
- Prepare the Wiring:
Cut wires to appropriate lengths based on your switch panel layout. Strip about 1/4 inch of insulation from both ends of each wire to prepare for connections.
- Connect Switch Wires:
Each switch in the panel will have a power input and output terminal. Connect the wires as follows:
- Connect the positive wire from the power source to the power input terminal of the switch.
- Connect the output terminal of the switch to the device you want to control (e.g., lights, winch).
- Ground Connections:
Make sure to establish a solid ground connection for each switch. Connect the ground wire from the switch to a common ground point on your Jeep’s chassis or directly to the battery’s negative terminal.
- Insulation and Protection:
Once all connections are made, insulate the exposed terminals and wire connections with electrical tape or heat shrink tubing to prevent shorts and corrosion.
- Test the Connections:
Before sealing everything up, use a multimeter to verify the correct power is being supplied to your switches. Turn the switches on and check for voltage at the output terminals.
- Final Assembly:
After ensuring everything is functioning correctly, reassemble the switch panel into its housing and secure it in your Jeep. Ensure that all wires are neatly organized to prevent any potential damage during operation.
Following these steps will enable you to connect switches to power sources properly, ensuring that your switch panel operates effectively and safely in your Jeep.
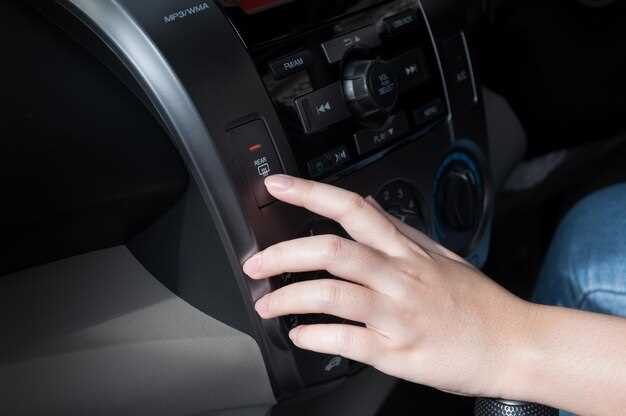
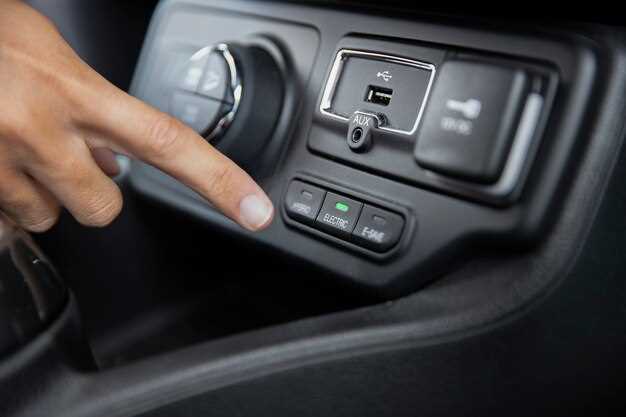
Installing the Switch Panel in Your Jeep
To enhance the functionality of your Jeep, installing a switch panel is an excellent modification. This panel allows you to control various accessories, such as lights, winches, and additional electronics, all from a centralized location.
Begin the installation by selecting an appropriate switch panel that fits your Jeep model. Ensure that the panel has ample switches for the accessories you plan to install. Once you have your equipment, gather the necessary tools, including a screwdriver, wire cutter, and electrical tape.
Next, locate an ideal position for the switch panel within your Jeep’s interior. Common locations include the dashboard or near the center console, ensuring easy access while driving. Once you’ve determined the location, use a template or a measuring tool to mark where the holes for the switches will be drilled.
Once the position is marked, carefully drill the required holes, ensuring not to damage any underlying wiring or components. Afterward, feed the wires from the accessories through the drilled holes into the vehicle’s interior. This will allow you to connect each accessory to the corresponding switch.
Now, it’s time to connect the switches. Each switch typically has three terminals: one for power, one for the accessory, and one for grounding. Connect the power source to the designated terminal, and link the accessory wire to the switch. Finally, attach a ground wire to ensure proper function. It’s advisable to use a fuse inline with each accessory to protect your electrical system from overloads.
After all connections are made, secure the switch panel in place using screws or adhesive, depending on the design. Test each switch by turning on the power to your Jeep and activating the accessories to ensure they function correctly. If everything works as intended, neatly organize any excess wiring and secure it using electrical tape.
Completing this installation not only provides convenience but also adds a customized touch to your Jeep, allowing you to control multiple accessories with ease.
Testing and Troubleshooting Switch Functionality
Once your switch panel is installed in your Jeep, it is crucial to ensure that each switch functions properly. To start the testing process, turn on the vehicle’s ignition to power up the accessory system without starting the engine. This prevents unnecessary wear on the engine while you perform your checks.
Begin by activating each switch on the panel one at a time. Watch for any signs of operation in the accessories connected to the switches, such as lights illuminating or equipment powering on. If a switch fails to operate the expected accessory, it may indicate a wiring issue, a faulty switch, or an accessory failure.
To troubleshoot, first check the connections at the back of the switch panel. Ensure that all wires are securely connected and free from corrosion. Loose or damaged connections can disrupt the power flow to the accessory. Use a multimeter to test the voltage at the switch terminals to confirm that power is reaching the switch when activated.
If the voltage is confirmed and the switch still doesn’t function, it may be defective. In this case, replace the switch and re-test to ensure the accessory now operates as intended. Additionally, confirm that the accessory itself is functioning by testing it directly with a known working power source.
Should you continue to experience problems, evaluate the routing of your wiring harness for any signs of wear or interference. Pay special attention to any areas where wires may be pinched or exposed, as these can lead to short circuits. Repair any identified issues and re-test the panel again.
By systematically testing and troubleshooting each component, you can ensure your switch panel operates smoothly, allowing you to effectively control your Jeep’s accessories while enjoying your off-road adventures.


